
I recently asked myself what kind of challenges this could bring along. Obviously, the USB forwarding via sys-usb to the dev VM could bring up some challenges. However, it worked like a charm for me and this is how I did it:
First of all, connect the Arduino board via the USB cable to your Qubes machine. You should get a notification in the right upper section of your screen telling you that a new device was attached: Device available – Device Arduino Yun available ...
This means, your machine recognizes the Arduino. Next step is to tell sys-usb to attach the device to your development VM. Let’s call this one: arduino-dev. In case the attachment via the GUI in the upper right corner does not work - try to do it via the command line:
- Open a Dom0 shell and check what USB-devices are attached:
qvm-usb - Your output should be similar to:
sys-usb:2-3 Arduino_LLC_Arduino_Yun - Next step is to simply attach the Arduino device to your RUNNING arduino-dev VM via dom0:
qvm-usb attach arduino-dev sys-usb:2-3 - Afterwards, go to your arduino-dev VM and verify that the device is recognized by the VM via
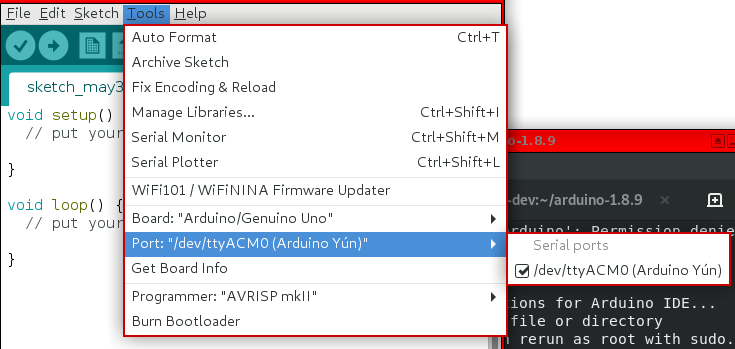
lsusb. The output should be something like:Bus 001 Device 003: ID 5123:3123 Arduino SA - Now, you can download the corresponding IDE in your VM and proceed with your development. In case everything runs successfully, you will see the Port properly in your IDE.
In case you are not working with sys-usb, there is another walkthrough here which obviously worked for the involved persons, however it looks more complicated.